
Hello and welcome! I’m here to guide you through how to use AI for portrait retouching in Photoshop. My name is Zurie Babin, and I’ve been working as a photo editor for over 10 years. As a production manager at a photo clipping and retouching company, I ensure every image is perfect. Whether you’re a beginner or have experience, this blog will help you enhance your portraits using the latest AI tools in Photoshop.
In this guide, we’ll cover everything you need to know about AI-based portrait retouching in Photoshop. With the power of AI, retouching portraits has become faster, easier, and more accurate. So, let’s get started!
Why Use AI for Portrait Retouching?
Before we dive into the steps, let’s talk about why AI is such a great tool for retouching portraits:
- Efficiency: AI tools save a lot of time. It automatically detects skin tones, blemishes, and lighting issues.
- Accuracy: AI can smooth skin, remove imperfections, and enhance details without losing natural textures.
- Customization: AI tools give you the ability to fine-tune adjustments based on the look you want for your portraits.
- Consistency: Using AI ensures that all your retouched portraits look polished in the same way, making your work look professional.
Now, let’s move on to the step-by-step guide for using AI in portrait retouching in Photoshop.
Steps for Skin Retouching & Smoothing in Photoshop
Follow these step-by-step instructions carefully to achieve a smooth and professional skin retouching effect using Photoshop.
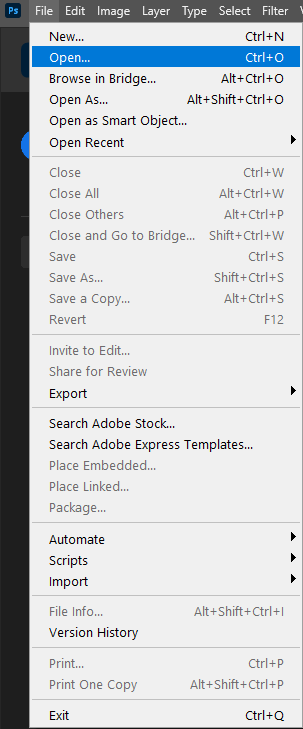
Step One: Open the Image
- Go to the File option in the menu bar and click on Open.
- Select the image you want to edit, then click Open to import it.
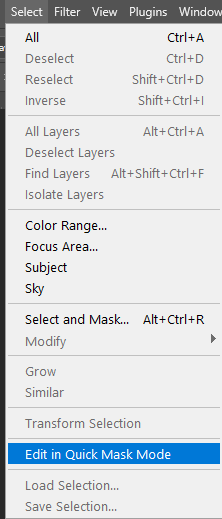
Step Two: Go to Selection
Navigate to Select > Edit in Quick Mask Mode.
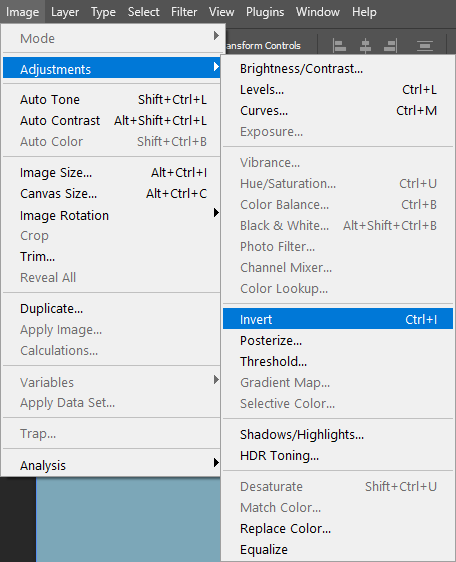
Step Three: Invert the Layer
- Go to the Image option in the menu bar.
- Select Adjustments, then click on Invert.
- Shortcut: Press Ctrl + I to quickly invert the layer.
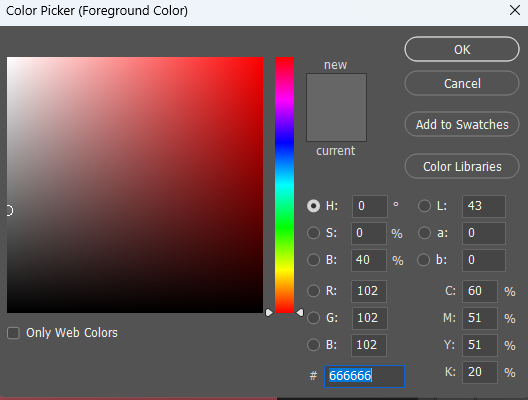
Step Four: Select Foreground Colour
- to the Menu Bar and select Window.
- Now, choose Colour from the window options.
- Shortcut: Press F6 to open the colour selection quickly.
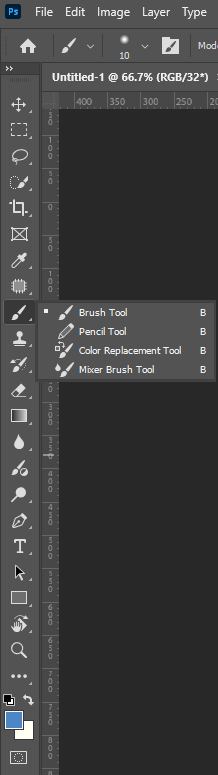
Step Five: Select Brush Tool
- Go to the Menu Bar, select Window, and then choose Brush Settings.
- You can also select the Brush Tool from the Toolbar.
- Shortcut: Press B to activate the Brush Tool.
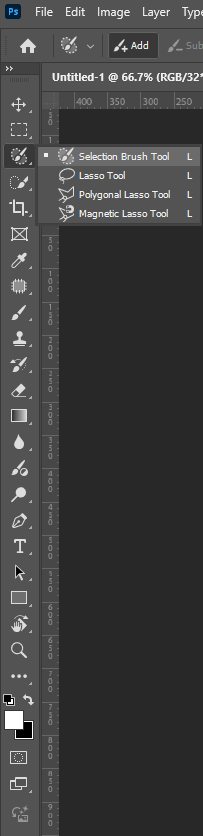
Step Six: Selection Brush Tool
- Locate the Selection Brush Tool in the Toolbar and click on it.
- Shortcut: Press L to quickly access the tool.
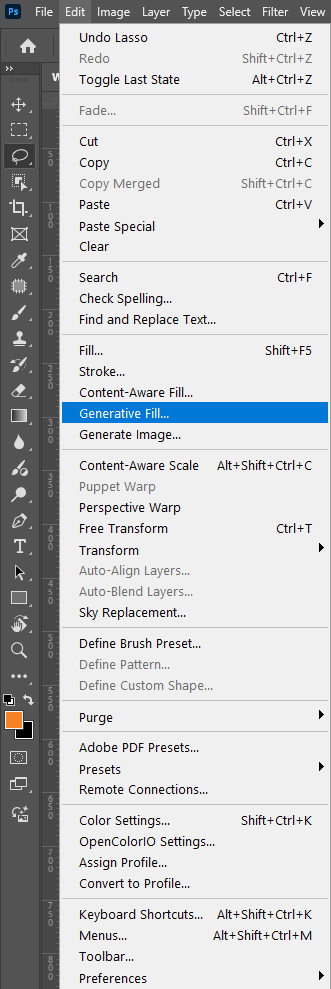
Step Seven: Generative Fill
- In the Menu Bar, select Edit.
- Now, choose Generative Fill.
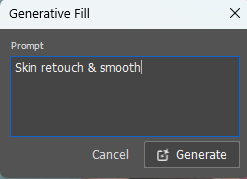
Step Eight: Fill Prompt
- Once you select Generative Fill, a prompt box will automatically appear.
- Type “Skin retouching & smooth” in the prompt box.
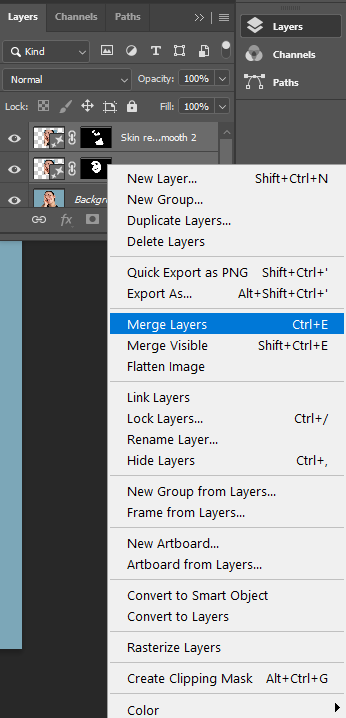
Step Nine: Merge the Layers
- In the Menu Bar, select Layer.
- Right-click with your mouse and select Merge Layers.
- Shortcut: Press Ctrl + E to merge layers quickly.
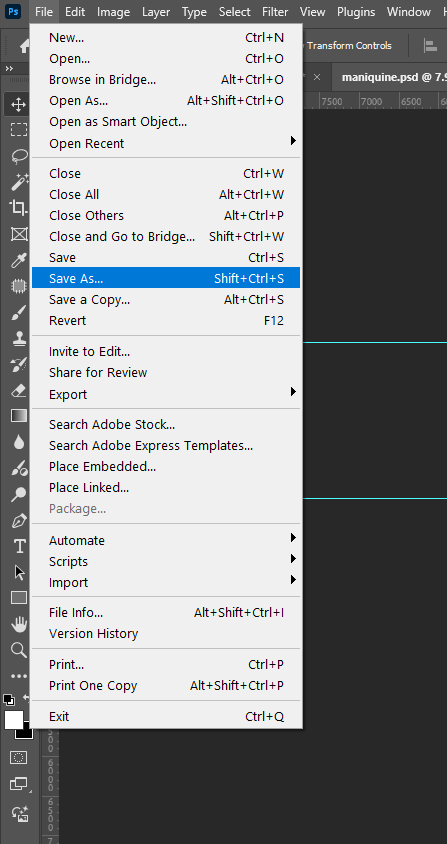
Step Ten: Save the File
- In the Menu Bar, select File.
- Click on Save to store your edited image.
- Shortcut: Press Ctrl + S to save instantly.
Additional Tips and Tricks for AI Portrait Retouching
While AI tools in Photoshop are powerful, here are some extra tips to take your portrait retouching to the next level:
1. Use Non-Destructive Editing
To preserve the original image and make changes later if needed, always work non-destructively:
- Convert to Smart Object: Before applying AI retouching, right-click on the image layer and select Convert to Smart Object. This allows you to make adjustments later without permanently altering the image.
- Work with Layer Masks: Use Layer Masks to apply retouching only to specific areas, such as the face or eyes, without affecting the rest of the image.
2. Fine-Tuning AI Retouching Results
AI does a great job, but sometimes you’ll need to fine-tune the results:
- Adjust Skin Smoothing: To avoid an overly smooth look, reduce the opacity of the Generative Fill layer or use the Gaussian Blur filter to soften the effect.
- Refine the Eyes: AI can sometimes overly smooth the eyes. Use the Spot Healing Brush or Clone Stamp Tool to fix any issues and keep the eyes sharp and natural.
3. Enhancing Facial Features
AI can smooth skin and remove imperfections, but you can manually adjust facial features to improve the look:
- Liquify Tool: Use Filter > Liquify to subtly adjust facial features like lifting the cheekbones or shaping the jawline.
- Spot Healing Brush: This tool is excellent for cleaning up small imperfections or blemishes that AI might have missed.
4. Adding a Soft Glow to Skin
To give the portrait a radiant, healthy look:
- Use the Dodge Tool (O) with low exposure (10-15%).
- Gently paint over areas of the skin (like the cheekbones and forehead) to add a subtle glow.
5. AI for Lighting Adjustments
AI can improve the lighting in the image, but you can also enhance it manually:
- Camera Raw Filter: Use the Camera Raw Filter to adjust exposure, highlights, and shadows.
- Dodge and Burn: Use the Dodge and Burn tools to add depth and contrast by lightening highlights and darkening shadows.
6. Hair Retouching
AI can smooth hair, but you may need to fix it for a more natural look:
- Smudge Tool: If AI over-smoothed the hair, use the Smudge Tool to refine hair strands.
- Clone Stamp Tool: To fix uneven areas of hair, use the Clone Stamp Tool to replicate hair texture from nearby areas.
7. Background Enhancements with AI
AI can also be used to adjust or replace the background:
- Generative Fill for Backgrounds: Select the background and apply Generative Fill to remove distractions or create a more aesthetically pleasing background.
- Replace Background: If you need to change the background completely, you can use Select Subject and replace the background with a new one.
Conclusion
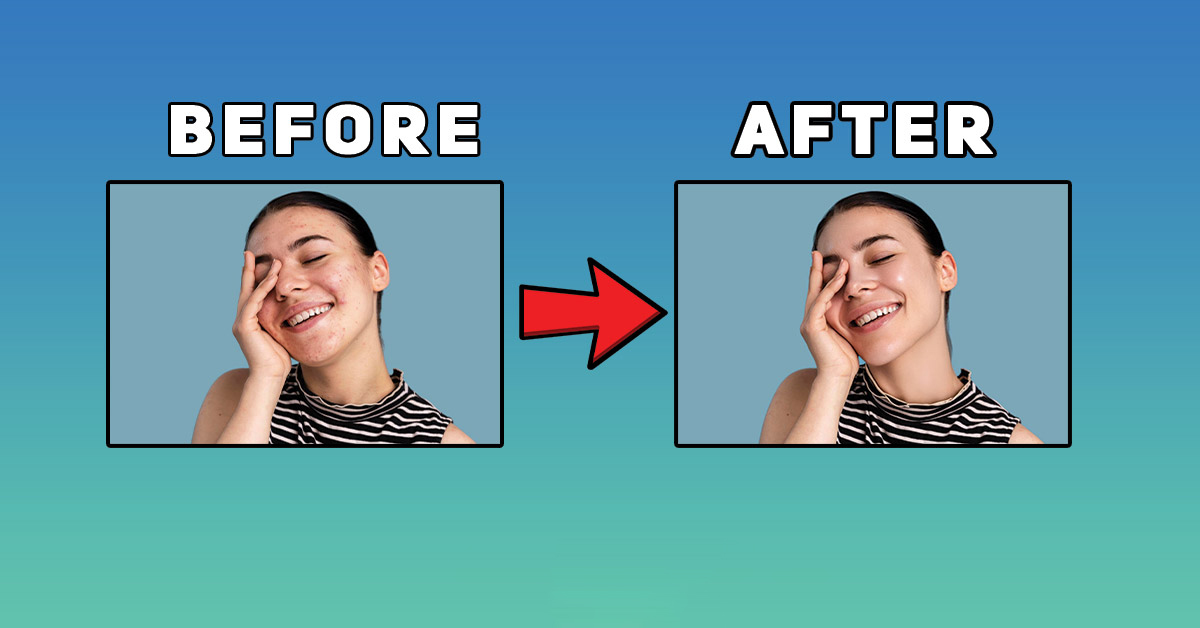
AI-based portrait retouching in Photoshop has made it easier than ever to enhance your images quickly and effectively. With tools like Generative Fill, you can achieve professional-level retouching without spending hours in front of the screen. By following these steps, you’ll be able to transform your portraits, giving them a natural, polished, and beautifully professional look.
Remember, AI is a great tool to speed up your workflow, but it’s still important to adjust and refine the results to match your style. If you follow these steps and keep experimenting with AI tools, you’ll be able to retouch portraits with confidence and create stunning results every time.
If you have any questions or need further help, feel free to ask in the comments below, and I’ll be happy to assist you! Also, be sure to check out the tutorial video for a more visual guide to AI portrait retouching in Photoshop.