Photo Post Production Hacks Every Editor Must Know
- admin
- January 26, 2025
-
- 1


Imagine you’ve just returned from a breathtaking vacation. You have dozens of photos packed with memories: sunsets over the ocean, cobblestone streets in foreign cities, and close-up shots of the foods you ate. When you look at the images, you feel proud of your journey. But then, reality strikes. The colors are dull, the exposure is off, and the picture doesn’t reflect the beauty you witnessed. This is where photo post-production comes in.
This is the moment of realization—the point where your editing journey begins. It’s the call to adventure. You know that with a little help, you can transform these photos into something that truly showcases the magic you experienced. But where do you begin? What tools and techniques will turn these snapshots into works of art?
This blog is your map. Together, we’ll walk through the twists and turns of photo post-production and explore the powerful hacks every editor must know. By the end of this journey, you’ll have the knowledge to master photo post-production and elevate your images to their full potential.
The Struggle with Ordinary Photos
Before we begin our quest, let’s take a moment to understand the problem many photographers and editors face: ordinary photos. You’ve spent time composing the perfect shot, capturing the essence of a scene, but when you open your editing software, something feels missing.
You may notice:
- Dull colors that don’t capture the vibrance of the moment.
- Blurry details that seem to fade into the background.
- Incorrect exposure making the image look either too bright or too dark.
This is where every editor starts—facing the challenge of transforming their photo into something that stands out. The good news is that you don’t need to be a professional to get the results you want. With the right tools and knowledge, you can overcome this initial struggle and unlock your photo’s true potential.
The Power of Layers
As you take your first steps into the world of photo post-production, you encounter your first new tool: Layers. At first, layers may seem like a foreign concept. But as you start experimenting, you realize their true power.
Think of layers as hidden paths that allow you to edit different parts of the photo without affecting the whole image. You can adjust the brightness, enhance colors, and fix flaws—each one in its own layer—so you never have to worry about ruining your photo. This is a transformative moment in your journey.
Mastering the Layers Tool
When you begin working with layers, you unlock the ability to perform non-destructive editing, which means you can make all kinds of changes without permanently altering the original photo. You can even go back and revise them later, keeping your options open.
Tip for the Journey:
Use adjustment layers for changes like brightness and contrast. These allow you to experiment without fear—knowing that you can easily undo anything that doesn’t look quite right.
With layers, you’ve crossed into a new world of possibilities. You now have the power to adjust, modify, and perfect your images at will.
The Color Grading Challenge
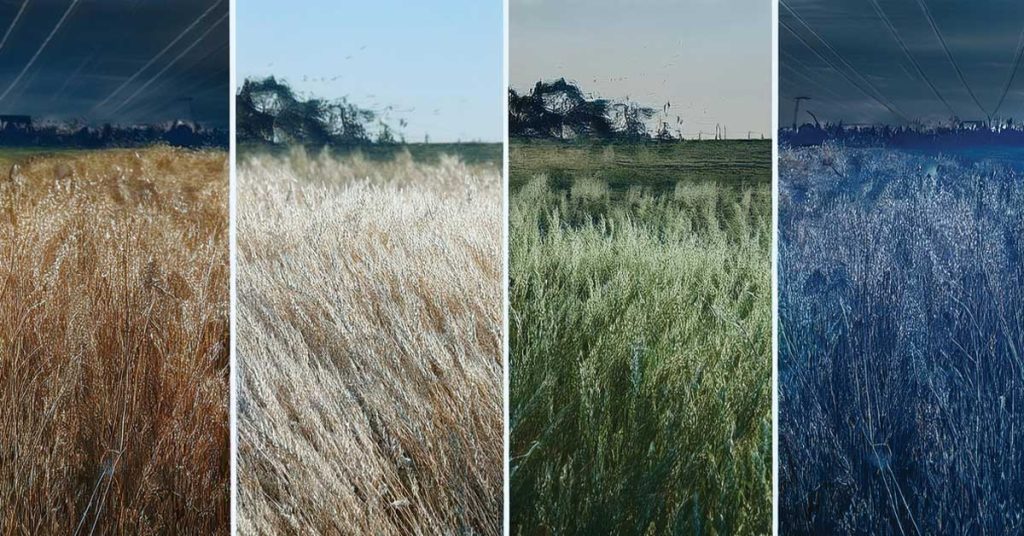
As you grow in your editing abilities, you face your next challenge: color grading. Imagine your photos are like blank canvases, and color grading is the brush that allows you to add depth, emotion, and vibrance.
In this stage, you discover the power of enhancing colors to evoke mood and atmosphere. You realize that you don’t just want to edit a photo—you want to tell a story. Whether it’s the warm glow of a sunset or the cool serenity of a landscape, color grading is the tool that brings your photo to life.

Transforming Your Photo’s Mood
Lorem ipsum dolor sit amet, consectetur
Through trial and error, you learn that adjusting the shadows, midtones, and highlights allows you to control the overall mood of your photo. You experiment with:
Curves to tweak individual color channels.
Split toning to add contrasting warm and cool hues to the highlights and shadows.
LUTs (Look-Up Tables) to apply preset color styles that give your image an instantly professional look.
Tip for the Journey:
Color grading is about feeling. Consider the feeling you want your photo to express before capturing the shot. Is it a warm, inviting glow, or a cool, cinematic tone? Once you know the feeling, use the tools to create it.
At this stage, you’re not just adjusting settings—you’re beginning to shape the narrative of your photo. Your images are no longer ordinary; they’re becoming works of art.
Sharpening and Noise Reduction
As you near the final stages of your journey, a new challenge emerges: noise and blurriness. You notice a slight fuzziness or graininess in some of your images, especially in darker areas. It’s a subtle but noticeable flaw that can distract from the overall beauty of your photo.
This is the moment to showcase your abilities. You must use the tools of sharpening and noise reduction to banish these imperfections and enhance your photo’s clarity.


Overcoming the Blur
You begin by applying sharpening tools, such as the Unsharp Mask filter. This technique enhances the edges of objects, making the photo look crisper and more detailed.
Next, you tackle the noise with noise reduction tools. Whether it’s grain from shooting in low light or the digital artifacts that sometimes appear, you find that a gentle application of noise reduction smooths out the image without losing detail.
Tip for the Journey:
Always apply noise reduction first, followed by sharpening. This ensures you don’t exaggerate the noise while enhancing the details.
You’ve now equipped yourself with the ability to refine the smallest details, bringing everything into sharp focus.
Exposure and Retouching
You’ve come a long way in your photo editing journey, but there’s still one more hurdle: Exposure and Retouching. These final steps are where you fine-tune your image to perfection, ensuring the exposure is just right and any imperfections are removed.
You start by adjusting the exposure—darkening overexposed areas or brightening those that are too dark. Next, you tackle retouching: removing unwanted blemishes or distractions, such as a stray hair or an out-of-focus object in the background.

Tips for the Final Touches
- Adjust the exposure slider to increase or decrease the overall brightness of the image.
- Adjust the highlights and shadows separately for a more refined effect.
- Use the Healing Brush Tool and Clone Stamp to fix blemishes, dust spots, or anything that detracts from the focus of your photo.
At this stage, your photo is near perfection. You’ve faced the challenges, overcome obstacles, and now your photo truly reflects the scene you originally captured.
Adding Creative Effects
As you stand at the pinnacle of your journey, you realize there’s one last tool you can use to add that final touch of creativity: textures and effects. Whether you’re adding a light leak for a nostalgic vibe or using a bokeh effect to add dreamy out-of-focus spots of light, these effects elevate your photo to the next level.
Adding Texture and Personality
Textures like paper, dust, or grain can give your photos a unique, artistic feel. Similarly, adding light leaks or bokeh effects can make your photo look like it belongs in a movie scene.
Tip for the Journey:
Use textures and effects subtly. The aim is to improve the photo without overpowering it. A gentle light leak or soft texture can elevate your image without stealing the show.
As you apply these final touches, you realize you’ve arrived at your destination: your photo is complete. It’s a masterpiece, transformed from a simple snapshot into a story that resonates with anyone who looks at it.
Conclusion
You’ve completed the hero’s journey of photo post-production. From struggling with ordinary photos to mastering the tools of color grading, sharpening, exposure, and creative effects, you’ve unlocked the secrets to transforming any photo into a work of art. With each challenge you’ve faced, you’ve gained the skills and confidence to tackle any photo editing task that comes your way.
But the journey doesn’t end here. Every photo you edit is another opportunity to refine your craft and tell a new story. Keep experimenting, practicing, and learning—because in the world of photo editing, you’re only limited by your creativity.
If you’re ready to continue your journey and explore more photo editing tips, tools, and resources, visit our site Qondle Technology. What’s the most important lesson you’ve learned on your photo editing journey? Share your thoughts in the comments below!
We just discovered something amazing!
Since the early days of printing, designers have been transforming text and images to create visually stunning layouts. This evolution continued into the digital age, where creativity meets technology to produce outstanding results.
